Griddle Stitch Pumpkin
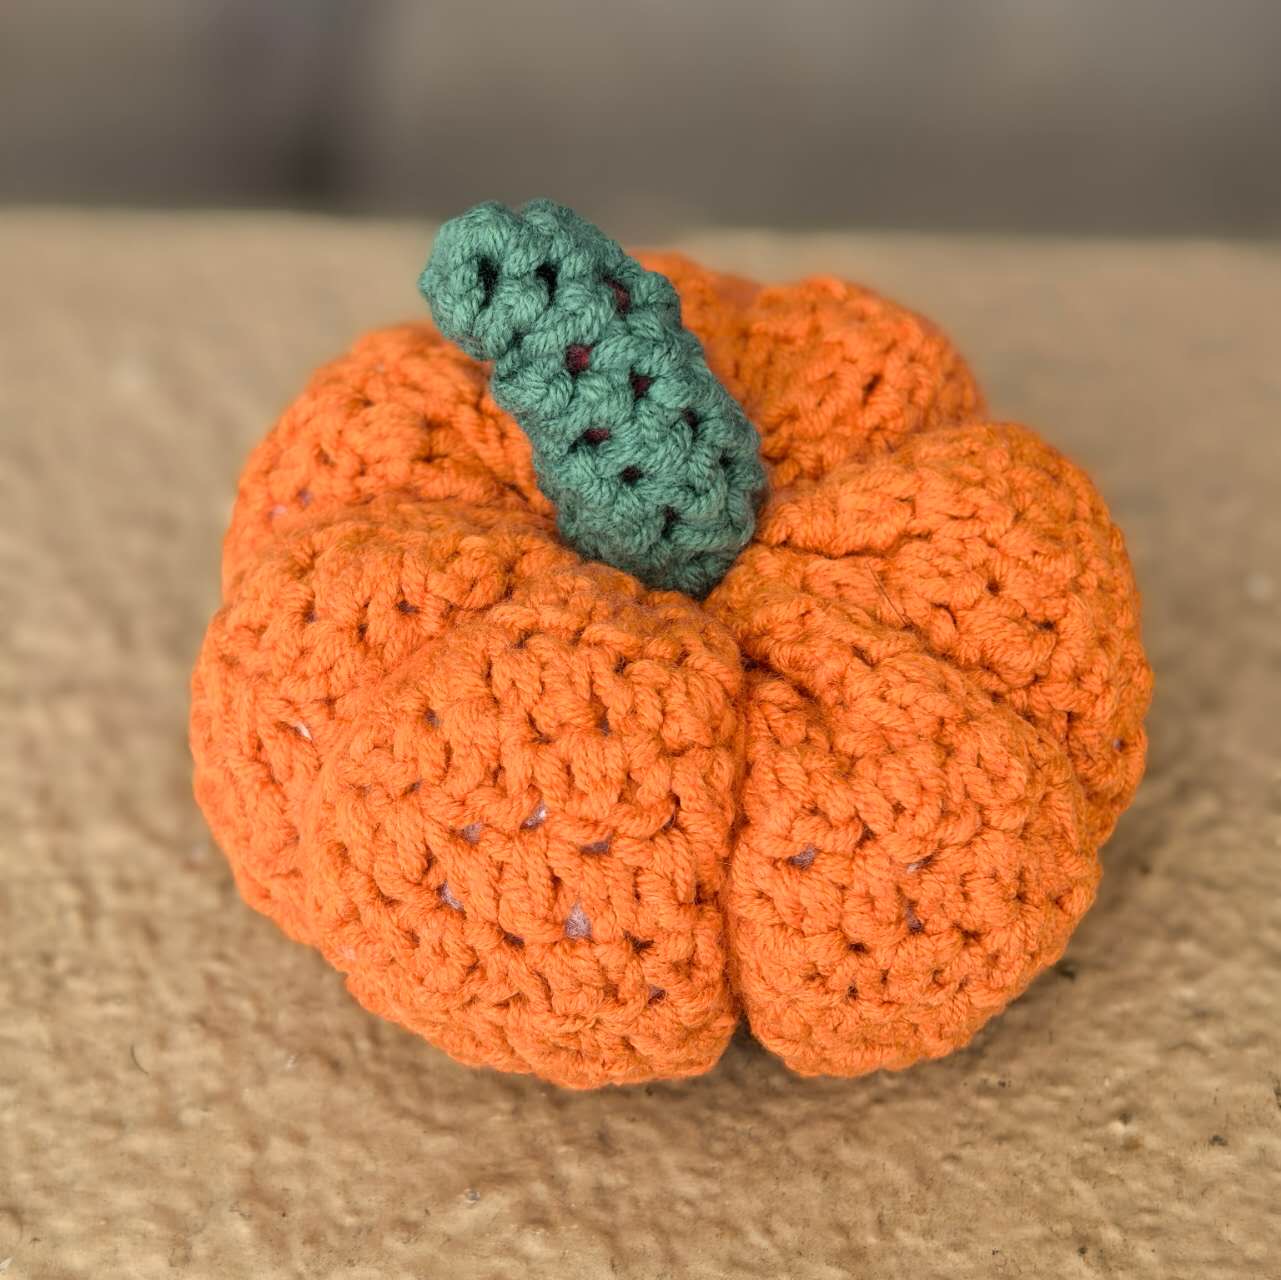
A little stuffed pumpkin made from a flat griddle-stitch rectangle: alternating single and double crochet gives it a bumpy, gourd-like skin. Seam it into a tube, gather both ends, cinch seven deep segments and sew on a stem. Finished size 3½ in / 8.8 cm across and 1⅝ in / 4.1 cm tall.
Úsalo en otro dispositivo — captura o imprime el QR y escanéalo con tu celular para abrir este patrón.
learn.crochetpop.app/patterns/griddle-pumpkin/work
Free — no signup needed
Skills needed
Don't know these yet? Find your learning path →Materials
- 2.5mm crochet hook
- sport weight yarn
- Gauge, measured on the finished piece: 1.64 sts × 2.5 rows per cm (4.2 sts × 6.4 rows per inch). Match this and the finished size follows.
- Yarn: shop the Sport to light-DK aisle and match the gauge above — not a "4-ply" label, which spans several weight categories. The tested yarn is a 60/40 cotton-acrylic blend, and the acrylic is what gives the soft, rounded segments; a 100% cotton substitute has less bounce and cinches into harder-edged ones.
- Yarn needle
- Polyfill stuffing (a small soft handful)
- Small amount of brown or green yarn for the stem
Enlace de afiliado — si compras, podemos ganar una comisión sin costo adicional para ti.
Instructions
Foundation: Chain 55
- R1Sc in 2nd ch from hook and in each ch across.
- R2Ch 3 (counts as dc), turn. *sc, dc; rep from * 25 more times, sc in last st.
- R3Ch 3 (counts as dc), turn. *sc, dc; rep from * 25 more times, sc in top of beg ch-3.
- R4Ch 3 (counts as dc), turn. *sc, dc; rep from * 25 more times, sc in top of beg ch-3.
- R5Ch 3 (counts as dc), turn. *sc, dc; rep from * 25 more times, sc in top of beg ch-3.
- R6Ch 3 (counts as dc), turn. *sc, dc; rep from * 25 more times, sc in top of beg ch-3.
- R7Ch 3 (counts as dc), turn. *sc, dc; rep from * 25 more times, sc in top of beg ch-3.
- R8Ch 3 (counts as dc), turn. *sc, dc; rep from * 25 more times, sc in top of beg ch-3.
- R9Ch 3 (counts as dc), turn. *sc, dc; rep from * 25 more times, sc in top of beg ch-3.
- R10Ch 3 (counts as dc), turn. *sc, dc; rep from * 25 more times, sc in top of beg ch-3.
- R11Ch 3 (counts as dc), turn. *sc, dc; rep from * 25 more times, sc in top of beg ch-3.
- R12Ch 3 (counts as dc), turn. *sc, dc; rep from * 25 more times, sc in top of beg ch-3.
- R13Ch 3 (counts as dc), turn. *sc, dc; rep from * 25 more times, sc in top of beg ch-3.
- R14Ch 3 (counts as dc), turn. *sc, dc; rep from * 25 more times, sc in top of beg ch-3.
- R15Ch 3 (counts as dc), turn. *sc, dc; rep from * 25 more times, sc in top of beg ch-3.
- R16Ch 3 (counts as dc), turn. *sc, dc; rep from * 25 more times, sc in top of beg ch-3.
- R17Ch 3 (counts as dc), turn. *sc, dc; rep from * 25 more times, sc in top of beg ch-3.
- R18Ch 3 (counts as dc), turn. *sc, dc; rep from * 25 more times, sc in top of beg ch-3.
- R19Ch 3 (counts as dc), turn. *sc, dc; rep from * 25 more times, sc in top of beg ch-3.
- R20Ch 3 (counts as dc), turn. *sc, dc; rep from * 25 more times, sc in top of beg ch-3. Fasten off, leaving a long tail for seaming.
How to Assemble
- 1Fold the rectangle so the two row-end edges meet, right side out. Thread the long tail you left on a tapestry needle and whip stitch the edges together — 20 row-ends — to make a tube open at both ends.
- 2Thread a long tail on a tapestry needle and run it through all 54 stitches around one opening. Pull tight and secure with a knot — this is the base.
- 3Stuff through the open end: firm enough to hold a round shape, soft enough that you can still squeeze it, so the segments can pull in later.
- 4Run a tail through all 54 stitches around the remaining opening the same way. Pull tight and secure.
- 5Cinch 7 segments: pass a long tail through the pumpkin from base to top, wrap it around the outside, pass it back through the center and pull snug so the wrap sinks into a deep groove. Repeat evenly around, then knot and hide the tail inside.
- 6Stem (make 1): with brown or green yarn, work 5 sc in a magic ring, then 5 sc in each round for 10 rounds — a straight little tube, no shaping. Fasten off, leaving a tail for sewing.Watch tutorial
- 7Sew Stem to the center top of the pumpkin.Watch tutorial
- 8Fasten off and weave in all yarn ends with a tapestry needle.
© 2026 CrochetPop · Gratis para uso personal — hazlo, regálalo y vende lo que tejas. Se prohíbe la republicación o la recopilación masiva de patrones, gráficos o instrucciones. Términos de uso